3DS Softmodding
Spooky Level: Cheap Thrills
This is probably the best and easiest place to start off in my personal opinion. It's very difficult to mess this up if you follow this guide from start to finish. Do not follow any video guides. I know this is discouraging for people who are visual leaners, but video guides are sometimes done by people who are not as knowledgeable, and very often are outdated. (Second one is the bigger problem, tbh.)
How to hack your 3DS
Oh, but did you think we were done here? Absolutely not. I want to suggest a few applications that I use and really like. Some of these are covered in the above guide, but I wanna talk about them anyway.
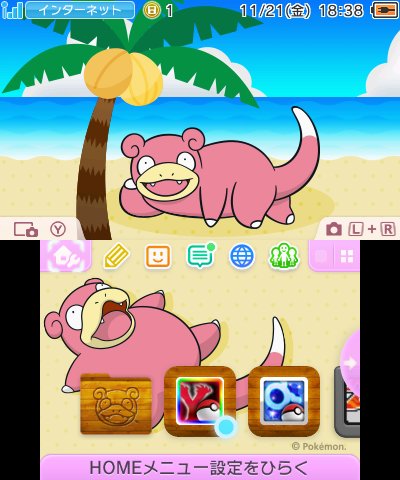
Anemone3DS I love this app. Here you can download any theme ever released for the 3ds and use it. You can even turn off the music that plays when in the menu that's attached to the theme, which is a game changer. My favorite for a long time has been this slowpoke theme (I know, you're so suprised) but I HATED the music that paired with that theme. With this? No more intrusive unwanted music. Right now though, I'm using a cute astrological pokemon theme.
Hshop's 3hs This app is perfect for, say, if you have a physical 3ds game that you'd like to have digitally, but you don't have the hardware to rip the files from your cart yourself. Or for any of those eshop exclusives that you can no longer purchase, rip 3ds eshop. Hshop prides itself as the ultimate 3ds content preservation service, and it's no wonder why. I really haven't found anything that they don't have. You can download things using FBI and the Hshop QR codes provided online, but trust me and just download the 3hs application. It is so much easier to use, particularly for people who do not have constant access to a desktop, or maybe even for people who have broken cameras on their older 3ds consoles.
EasyRPG Player This is for playing RPG Maker 2000/03 games on different platforms, including the 3ds. I found that the games look really crisp and beautiful on the 3ds and really enjoyed having portable versions of my favorite rpg maker games. I even made a compatibility list. If you'd like me to test other RPG Maker games and add to this list, feel more than free to reach out! C: This utility also works flawless on pc/mac/linux if you'd rather play that way, as an aside.
Wii Softmodding
Spooky Level: Spooky Scary Skeletons
This is honestly equally as easy as softmodding your 3ds. Same rules as above. Follow guide to the letter starting from the beginning, do not skip any steps, do not use a video guide. I've done this to two different wiis with absolutely zero problems.
How to hack your Wii
If your Wii is at system menu 4.3 and you have an SD card, you can use Letterbomb which is my preferred method of softmodding. If your system menu is not updated, do not update it and refer to the first link to find the best method of exploiting your Wii for your system.
Like the 3DS there's some utilities I want to suggest after you're done installing the Homebrew channel, Bootmii, and backing up your console. All those steps can be found at the above how to hack your Wii link.
d2x cIOS Installer Unlike the 3ds recommended apps, this one is practically a nessessity to get a ton of other applications loading. If you're trying to use some other application, and it spits out an error about the cIOS, this is the guide you need to follow. Super mega important. The main reason I find modding the Wii to be slightly harder than the 3ds is trying to figure out this step, but it's def doable.
Nintendont My preferred way to play gamecube backups on my wii consoles. Requires the d2x cIOS Installer. It lets you play Gamecube backups with any controller, making it perfect for a Family Edition Wii, aka those Wiis that were released later in the Wii's lifespan that do not come with gamecube controller and memory card ports. It also can emulate gamecube memory cards for you. Not having enough room on your memory card is a problem for past you. This is genuinely my preferred way to play gamecube games nowadays.
Playstation 3 Softmodding
Spooky Level: Slasher Chills
I recently got into softmodding my playstation 3. I went down this rabbit hole for two reasons. One, I was gaming on my playstation 2 one day, and noticed that a lot of my games were just way too dark. Particularly I was playing the ps2 classic The Thing and found certain areas of the game unplayable due to how dark it was. Taking to reddit, I found very quickly that my newer, modern tv was to blame. And while my tv isn't THAT modern (no 4k, only 1080p) its no crt, which is what the Playstation 2 was meant to be played on. Second reason? Shadow Hearts, one of my partners favorite games, is not available for purchase easily anymore and I wanted to play it for my partner.
I found out very quickly that HDMI Upscalers are simply out of my price range at the moment. While I'd LOVE to own one of these, you're dropping 100 us dollars for a decent one. Not even good, just decent. My other option was to try to find a crt tv. While I'd love to own a small crt television, I just genuinely don't have a place to put it. Plus, I'm disabled, and the idea of having to move it around when I move out is daunting. Even being able to go meet someone off of facebook marketplace or craigslist for a small crt tv is something that I probably wouldn't be able to do without help.
With that in mind, I thought to myself, hey, why not look into softmodding my Playstation 3? Now, I own a slim model, and I found out very quickly that a full exploit of my system is currently impossible with the tools developed, and I think most of the devs for this system have likely moved onto modding the Playstation 4 instead. But not all hope was lost! I found that I was able to install PS3Hen to get around this.
But real quick, let's take several steps backwards. Because if you're interested in softmodding your Playstation 3, you need to know what model you have, and what exploit to use.
How to Hack your PS3 from the console mods wiki is a very good start. Here you can determine which model you own and which exploits are compatible with your system. Using CFW is almost always preferable over Hen. Hen stands for Homebrew ENabler. CFW is Custom Firmware.
Updating your Firmware If you can run Custom Firmware, you can read more on how exactly to do that here. If you have one of the first gen phat consoles, this will always be the best option for you. If you've discovered, like me, that you can't use CFW, then your best option is...
PS3HEN This is what I had to use, since I didn't have access to CFW because my console is just too new. Hen is essenstially CFW-lite, created for people who don't have access to full CFW, aka people like me with newer Playstation 3 consoles. Hen does a lot of what CFW can do, but with some limitations. You won't be able to install Linux on your Playstation 3 with this bad boy, or Overclock your CPU for instance. But for my needs, this was perfect.
After this, you'll need a utility on your ps3 to serve as a file browser. In the PS3 Mods Wiki there's a section here dedicated to listing current File Managers. Which one you can use will be somewhat reliant on if you're using CFW or Hen. There also seems to be a lot of contention among users which one is "the best one." I'm currently using MultiMan, and after I figured out how to disable the music that autoplays, it was completely servicable and not difficult to figure out.
PS2 Classic GUI is a windows program (that I had to run in my windows virtual machine, lmao) and PS2 Classics Manager is the program installed on your PS3 to play said PS2 Classics. First, you take any PS2 iso file and run it through the Classic GUI program, which formats the game so a ps3 can read it. Then you copy the appropriate files to your PS3, rename them accordingly, and you've got the ability to play ps2 games on your ps3! Pretty cool, right?
Since I'm new to PS3 Softmodding, I do hope this is to the point but broad enough to help you figure things out. Here's some other links that have helped me out.
Ps3 Mods Wiki I already linked this to show the variety of different file managers avaliable to use. But there's a lot of other resources here as well, including an FAQ and tutorials on how to do things I haven't even tried yet. If you have a question, they probably have an answer over here.
Brewology Store a collection of homebrew, utilities, and a whole multiman section. You'll probably end up here if you need to download something.
PSX Palace forum another place you'll probably end up as you're navigating and trying to find files and resources on ps3 softmodding. A lot of people making exploits and utilites post their update logs and releases here.
Ps3 piracy Subreddit Would this section be complete without a link to a subreddit? While I don't think this is as robust as I've seen from other modding subreddits, it's always worth a quick search here to see if someone else has run into the same problem(s) that you might be having.
Of course, as I'm a beginner to this particular scene, I'm not as knowledgeable here. But if you run into problems and want to ask me, I'm only a quick email away. Also feel free to email me if you want to add onto any of the softmodding information here, or want to correct me on anything! Feedback is more than appreciated!!!
DS Repair
Now we're onto the various repairs I've done on my own consoles! I've repaired two DS Lites in my time. One is the DS Lite I've had since I was a teenager. The hinge broke on it which is something that happens to a lot of DS consoles. This was a pretty straightforward repair. I just needed a replacement piece of the shell, which I opted to buy an OEM piece on ebay, which for DS consoles is typically a good idea. Second party shells tend to be made of cheaper plastic, sadly. Anyway, with that done, I just took apart the console, dropped the new part in, and reassembled. The hardest part of this repair was just the act of taking apart and putting together the console. In particular the ribbon cable that controls the speakers and upper screen is a pain, but is absolutely doable. The most important part of this (and any) repair is just to be patient.
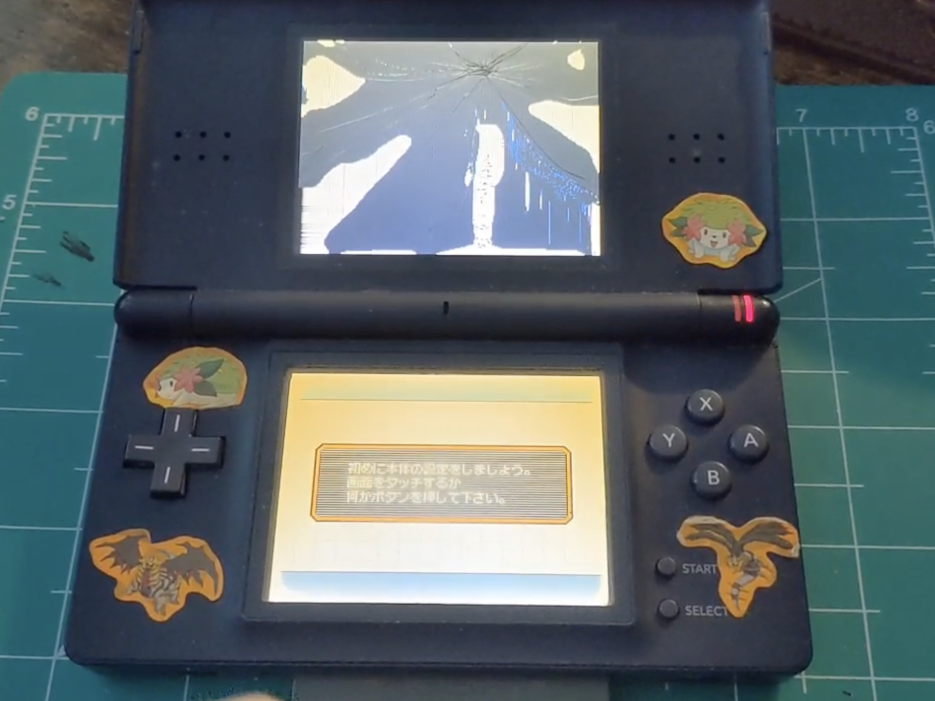
The second repair I did was for a DS Lite I bought secondhand in pretty bad shape. While the screens looked fine, upon powering the system on you could tell that one of the interior layers of the top screen was cracked. Both screens were weirdly oranged. The bottom screen has this strange circle around the edge, almost like a vinette affect, where the center is viewable, but the edges are just black dead pixels. I was also having some problems with the arrow buttons. This was always going to be a system to shiny hunt on, so my goal was to fix the buttons and drop in a new top screen. I wasn't super concerned with the bottom screen. It doesn't look the best, but it does work, so for now, I left it.
I disassembled this system too, and then got to work. The button presses were fixed easily by cleaning the contacts, however, I noticed that the rubber membrain responsible for button pushes was worn and tearing. I opted to leave it for now, knowing that I'd eventually need to be swapped out, but I didn't have the parts to do it at that very moment.
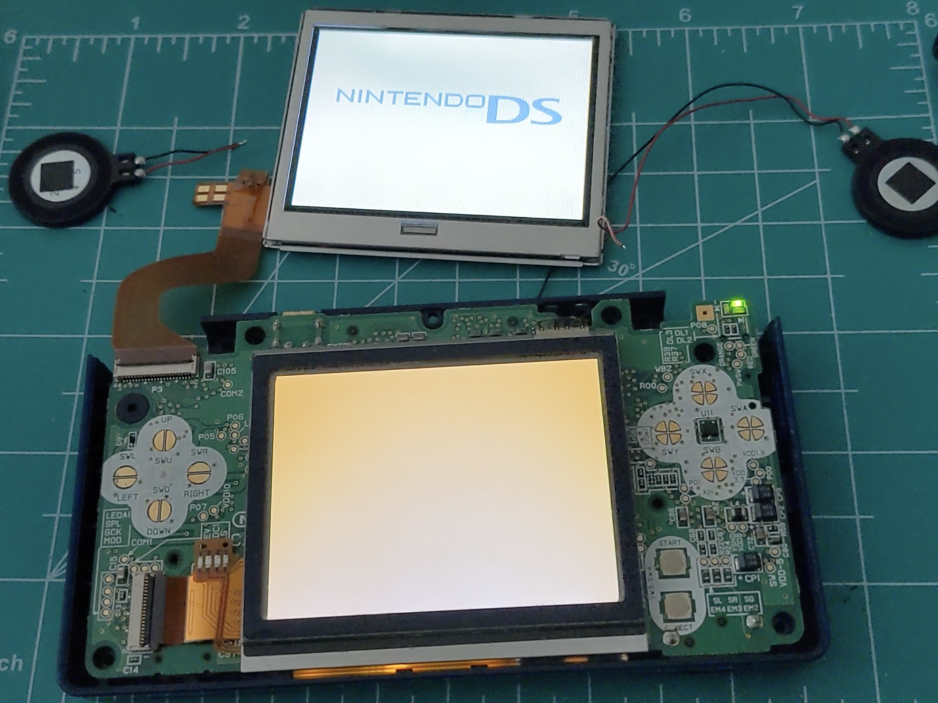
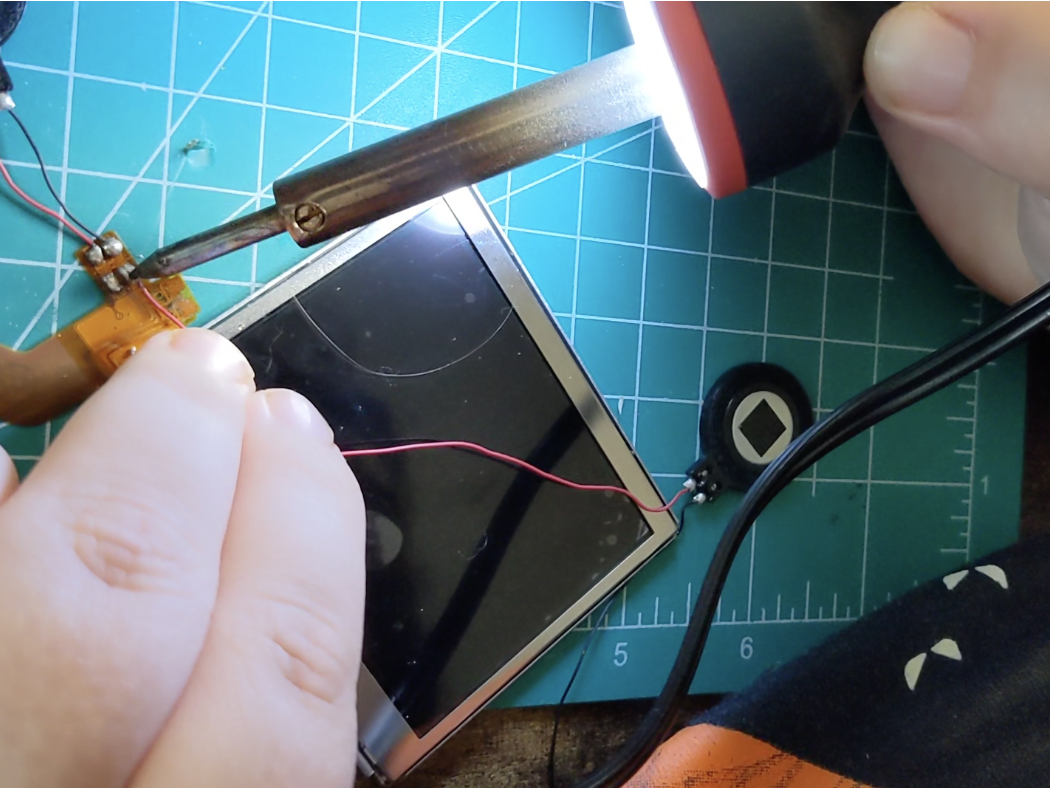
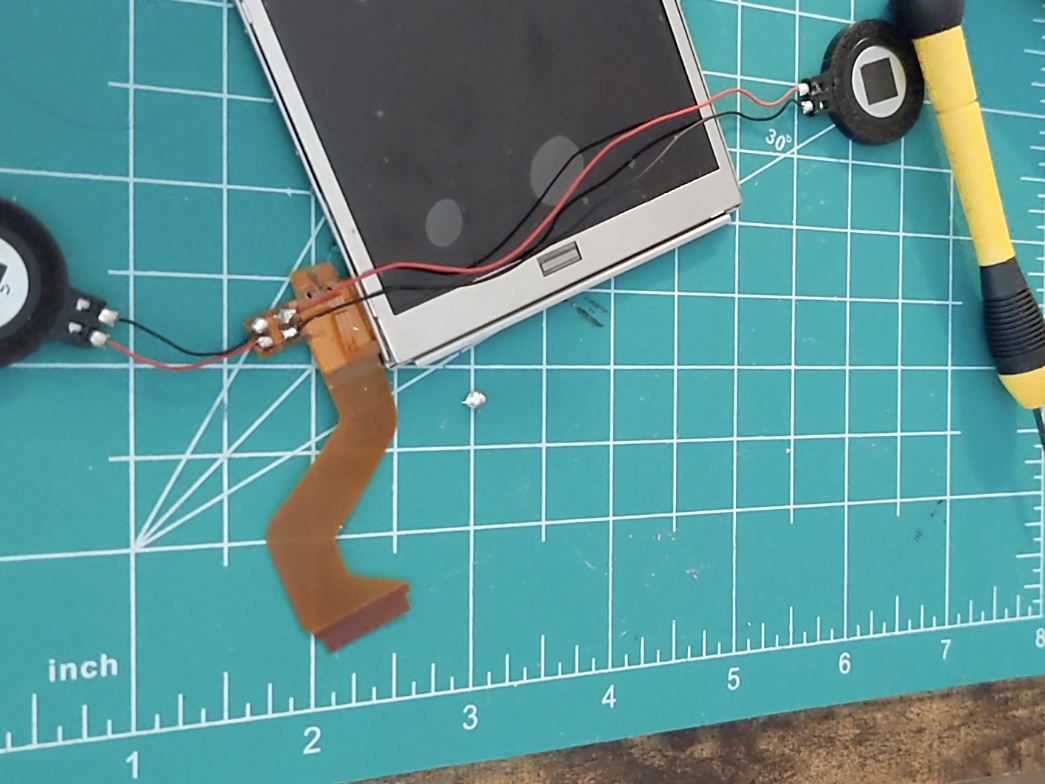
Sadly the first replacement screen I got was faulty. Luckily I was able to get a second one at no additional charge which worked fine. From there I needed to desolder the speakers and reapply them to the contacts on the new screen ribbon cable. I'm not the best solderer, but I was able to do this just fine after a few tries. I found it easiest to drop a bit of solider in the middle of the two contacts on one side and then use the solidering iron to seperate that one larger blob of solder into two smaller ones. Then I reheated those up and attached the speaker wires. After that I was able to drop in the new screen and reassemble everything.
The new screen is aftermarket but honestly looks amazing. The thing is, now that the top screen is immaculate, the bottom screen looks way worse now, lmao. I'd like to also replace the bottom screen at some point, and I do need to replace that membraine for the arrow keys. However, getting to the bottom of the console is much much easier than the top of the console, so when I have the time and money again, I'll crack this bad boy open once again.
The main thing I did, and what you should do too if you wanna do a similar repair, is to make sure to at points hold the battery in place at the back of the motherboard and power the console on to test things. I tested both screens, I tested my speaker soldering job, test things before you put the console back together fully. If you don't, and something's not working, you're going to be really frustrated when you have to take everything apart all over again.
I also took the chance while doing both repairs to clean everything. With DS Lites I noticed the edge of the console collects a lot of dirt, which was really obvious on my childhood pink DS Lite. It's just a good chance to clean everything up and get your console back into good condition to keep it alive even longer.
Wii Repair
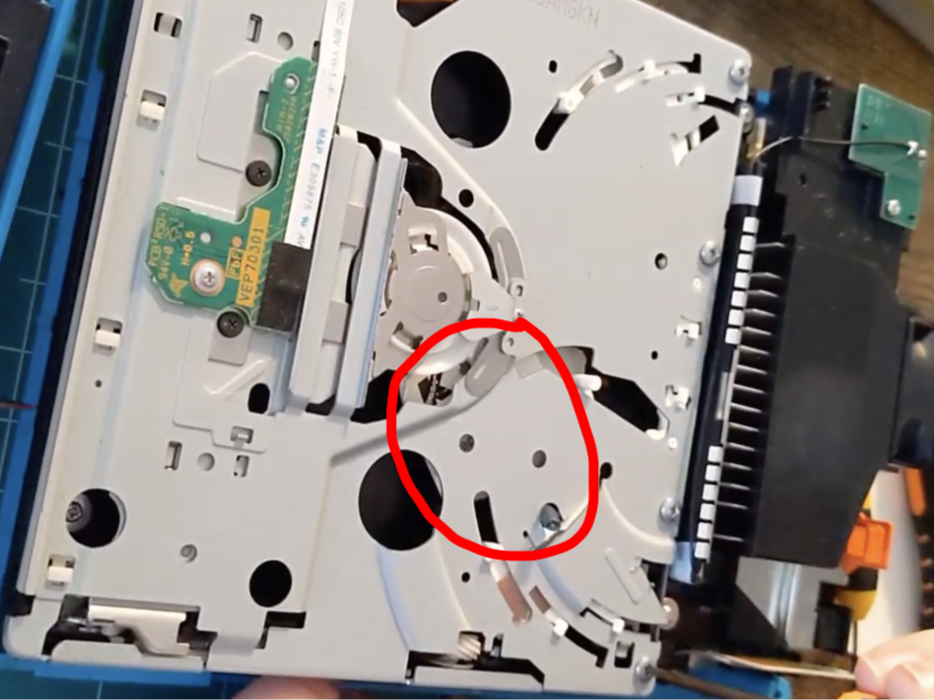
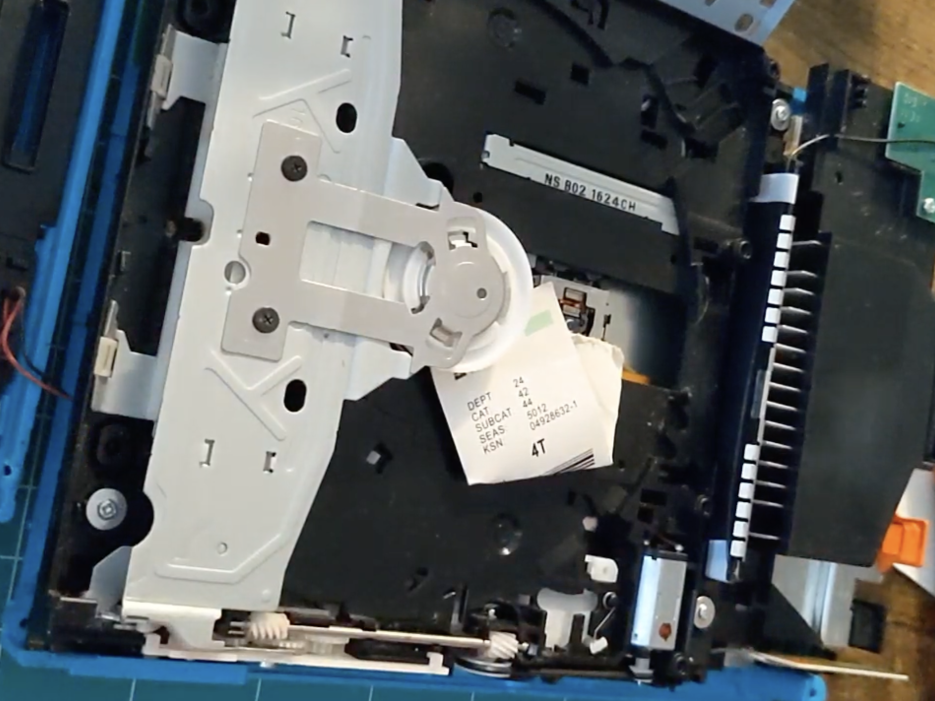
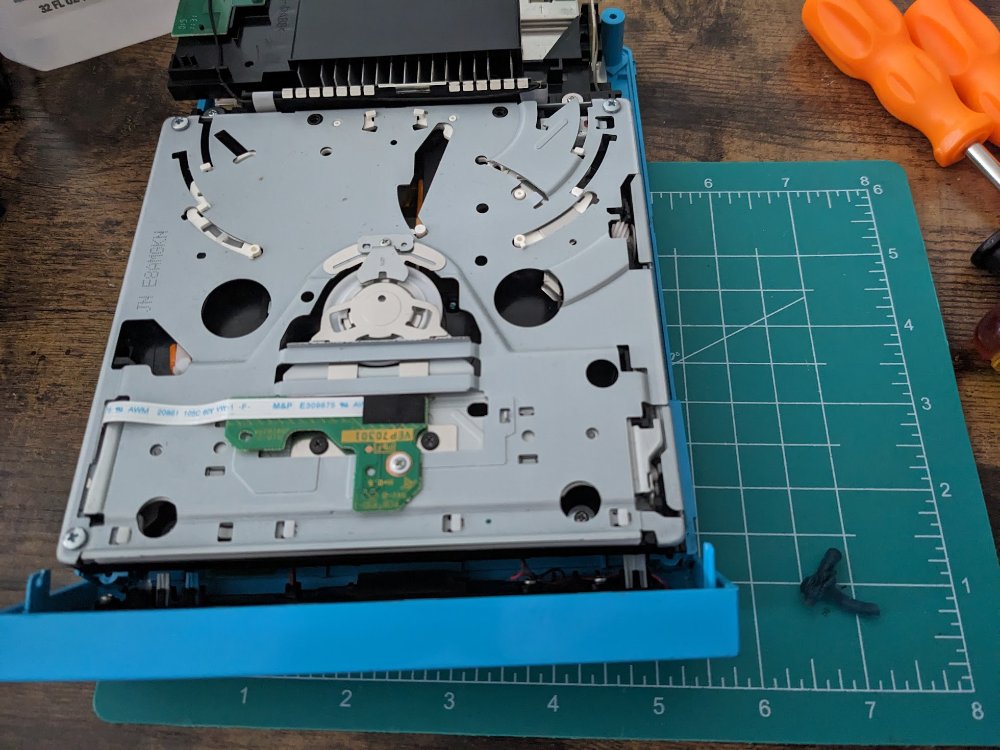
I don't have that much bragging rights for my Wii repairs. I've only repaired one blue family version console, which is just short for no gamecube fun allowed. This system is cosmetically in kind of bad shape, was missing a lot of screws, but the main problem was that the disc drive just wasn't working anymore. I opened the system up and pretty quickly found an old kmart clothing tag as well as what I think was part of a sticky hand stuck in the disc drive. I pulled both of these out and cleaned the lens that reads disc drives for good measure. After that, it works just fine.
Most Wiis with "broken disc drives" usually were just in range of a five year old who stuffed something into the disc drive, you take that out, you're usually good to go. It's not an uncommon thing to see at all for Wiis considering the demographic of the system. If you can get a cheap Wii with a broken disc drive and want one of these systems for yourself, I'd highly suggest it. (If you get one that really does have a broken disc drive, just softmod your wii and you won't even need the disc drive anymore!)
Xbox 360 Repair
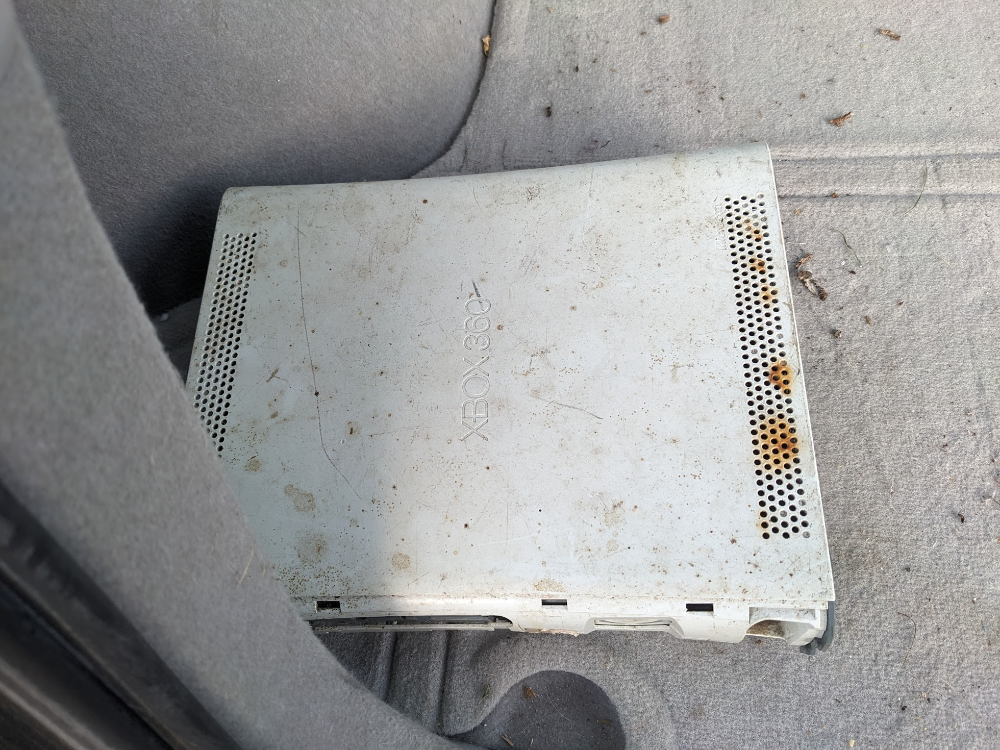
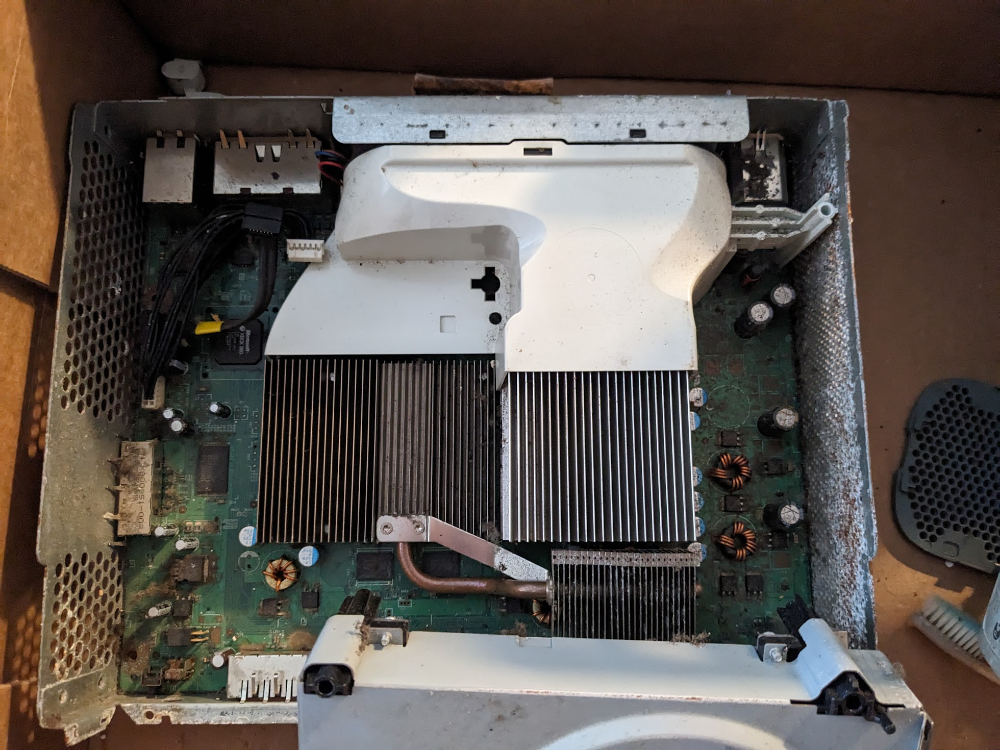
If the last repair recount was too easy, this one is much too difficult. I found an xbox 360 with a jasper motherboard at a local junk shop and paid $5 for the thing. I figured for $5 I could at least have some fun and keep myself busy. At worst, I'd have a junk console to practice my soldering on. At best, I'd have an Xbox 360 to softmod and play games that I've never played before.
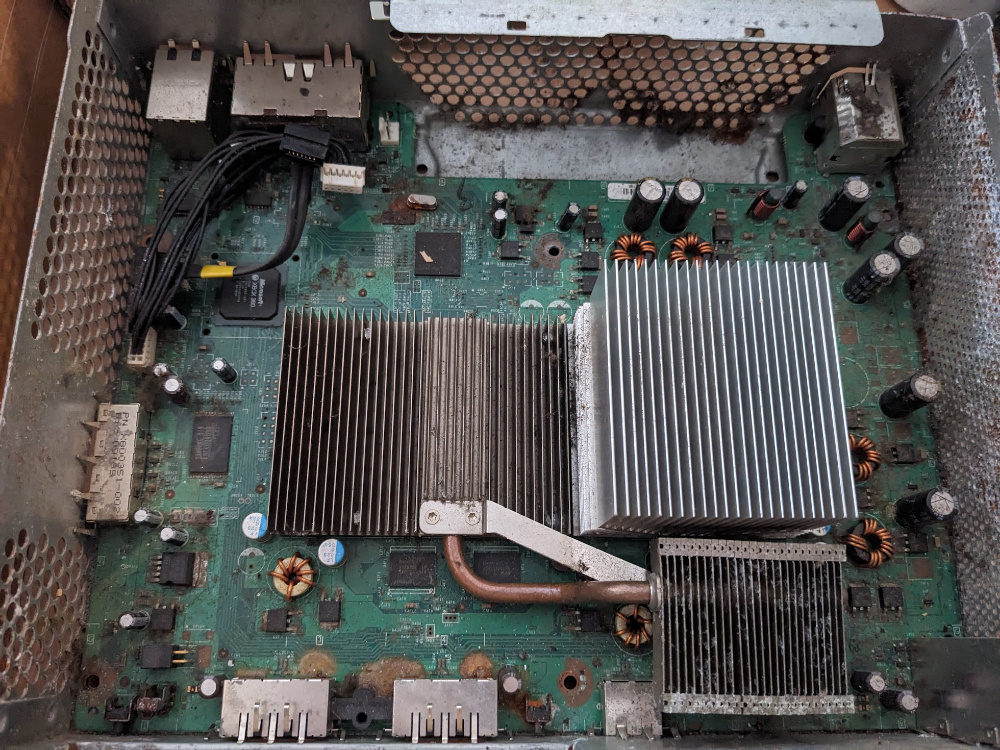
There's just a lot of dirt and dust and grime on this thing, all the way down to the motherboard. I have no idea how this sucker got so gross. Clearly, this is the spookiest thing on this page, abusing your console to the point where the motherboard is caked in a layer of grime. There is a lot of rust on this thing so I was concerned that there'd be rust on the motherboard, but I'm praying that there wasn't.
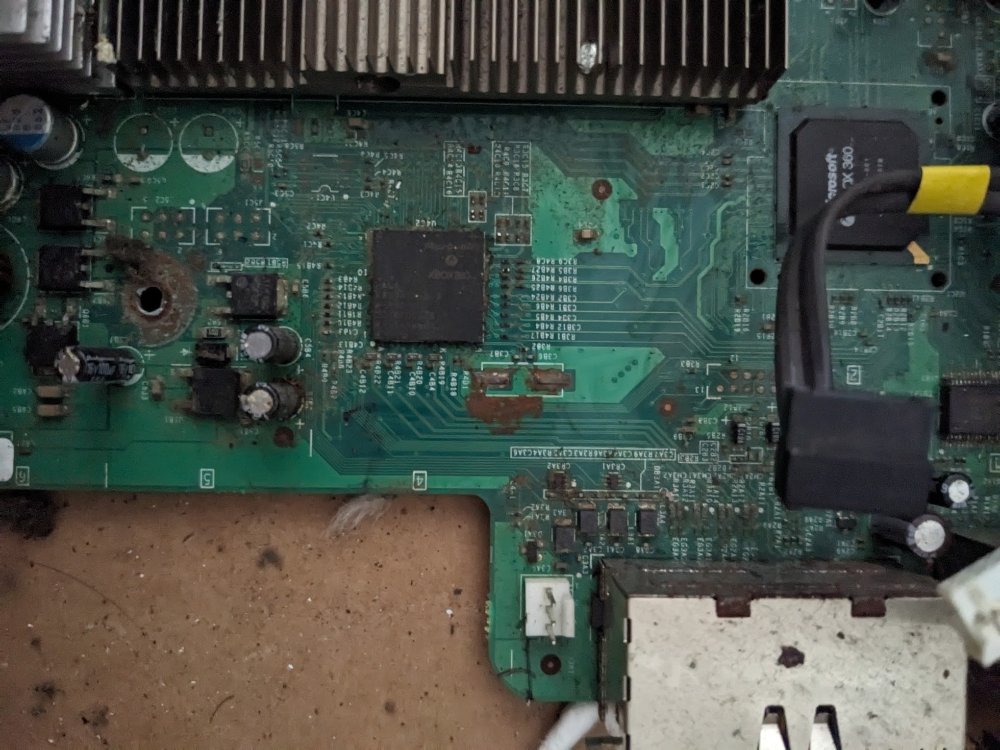
Sadly, my prayers were not answered. The piece of the board responsible for audio has completely fallen off due to rust, and there's a small patch of rust next to that, breaking a lot of traces in that particular spot. The traces are pretty close to the daughter board that has the power button on it, so I do have a theory that the console gets power, but the button just can't make the connection to actually turn on the console. My plan is to try to rewire those connections to see what happens. I've also got one busted capacitor, so I'm gonna replace that one and a few more too, because might as well. I'll also need to figure out what to do about audio at some point. But if I can get this thing on, I'll consider it a huge success in tinkering.
Wii HDMI Mod
I found a few youtube videos going over a modkit to install hdmi into a wii and yes, I absolutely want to do this to my main wii at some point. You can see the kit for sale here at a whopping $80 but man. So worth it. I think the only downside is that it uses mini HDMI which is just a rarer cable, so I'd have to buy the kit and a Mini HDMI cable since I have several HDMI cables kicking around, but no Mini HDMI cables. I get that it's a space saving measure since there's not a whole lot of room at the back of a wii to begin with, but I do wish I at least had the option of a regular HDMI cable. Still going to do this mod though.
Xbox 360 Case Mod
This is a major in the future thing, but I have a lot of work to do cleaning up that xbox 360, and I don't think I'll ever get the case to look good as new just because it's so banged up. I found some cases for sale where they cut out a large panel in the front and put in arcylic or glass instead with leds in the back. I thought this would also be a really fun way to show off the fixes that I'll need to do to the board in order to get it to work too. But of course, I don't want to pay money for the case, I want to make it myself! It took a bit of hunting, but I finally found this instructables guide with the soldering I'd need to do to power the LEDS which is exactly what I wanted. I know I'm probably putting the cart before the horse on this one, but still, I'm just really excited for this project.
